Picture
Application #
Use the image element to illustrate your WBT. This element is part of the basic elements and is therefore versatile. To better explain the images, you can assign labels to the image and position them at important locations on the image.
Video tutorial #
Learn in the following video tutorial how to create the element
Add image element #
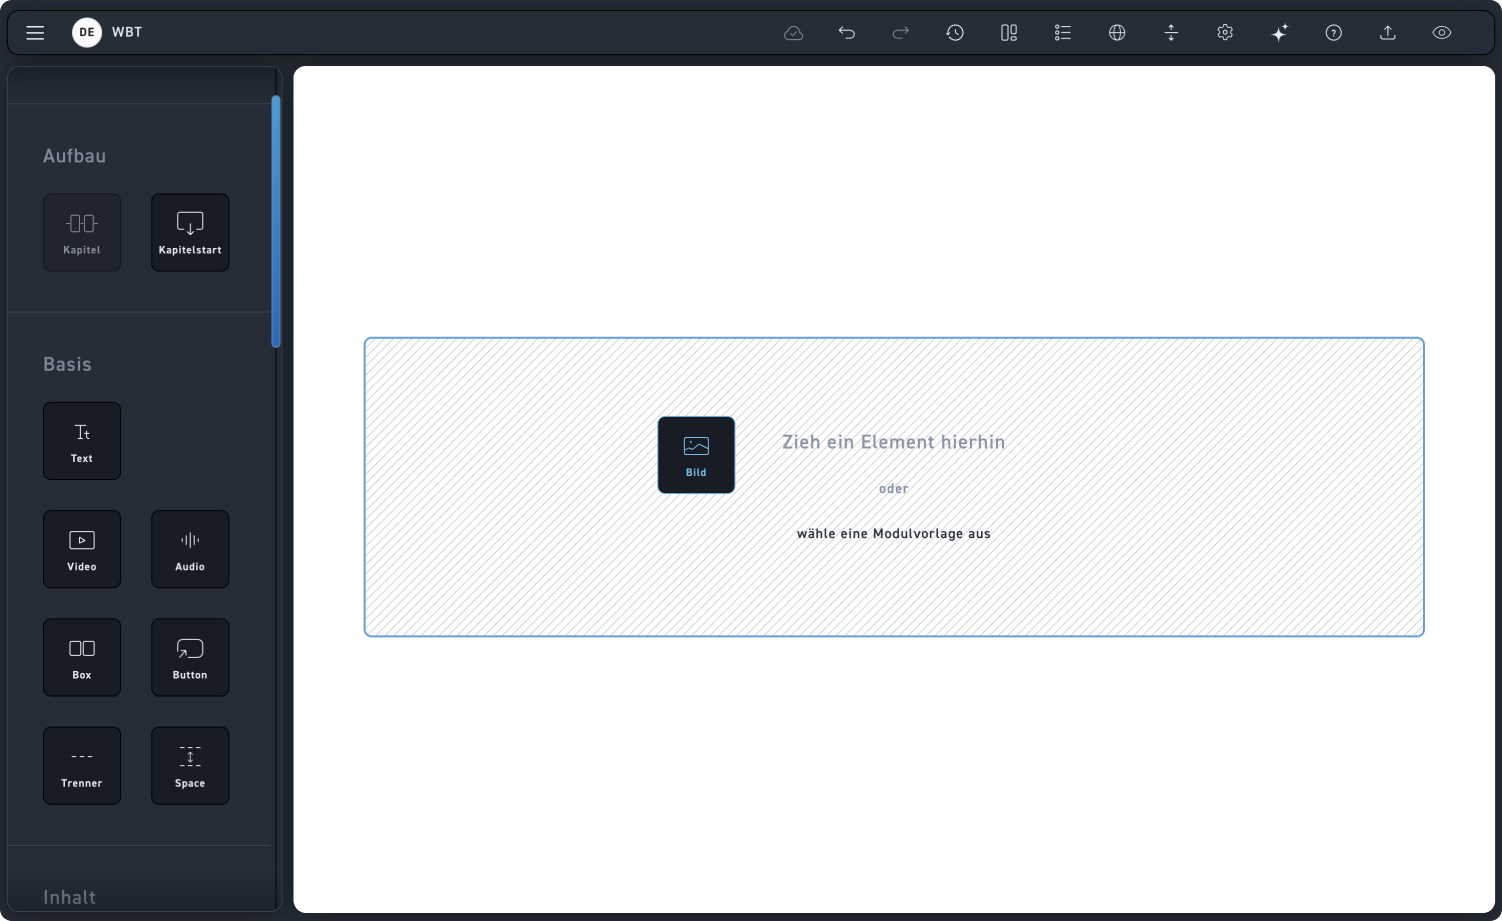
Drag the Image element into a module or section.
Picture Settings #
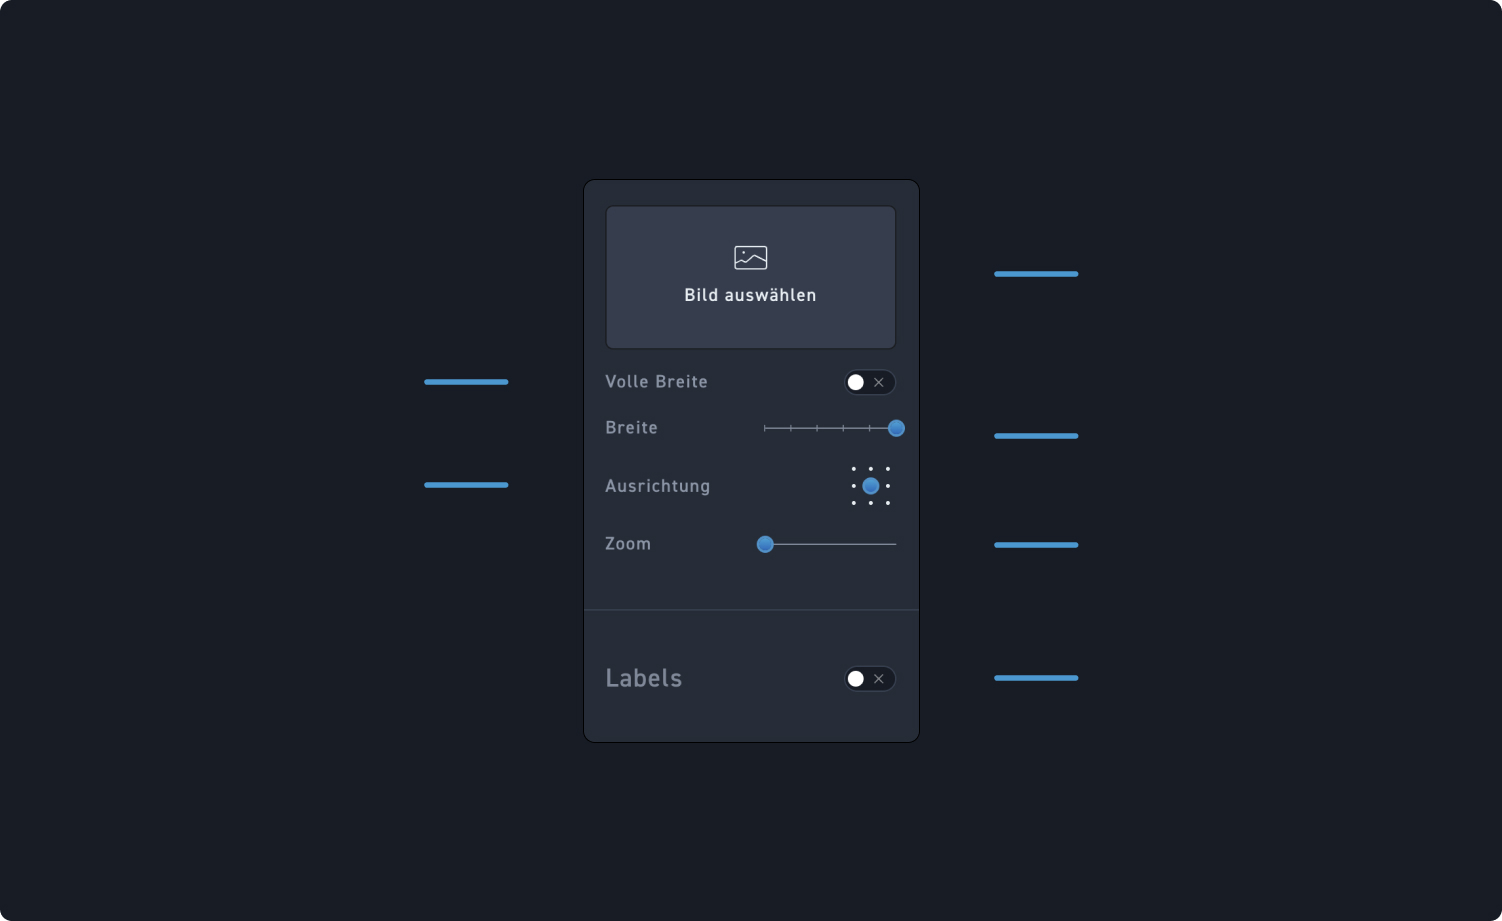
Check out the hotspots to see which settings are available for the image.
1
Upload media
Click the „Select Image“ area to open the media library. Choose an image and confirm your selection.
2
Full width
Determine whether the image should be displayed in full width.
3
Width
Adjust the image size using the slider. From extra narrow to extra wide.
4
Alignment
Decide how you want to align your image. By default, it is always centered.
5
Zoom
Move the slider to zoom in on your image.
6
Labels
Turn on labels if you want to further label your image using labels.
Label settings #
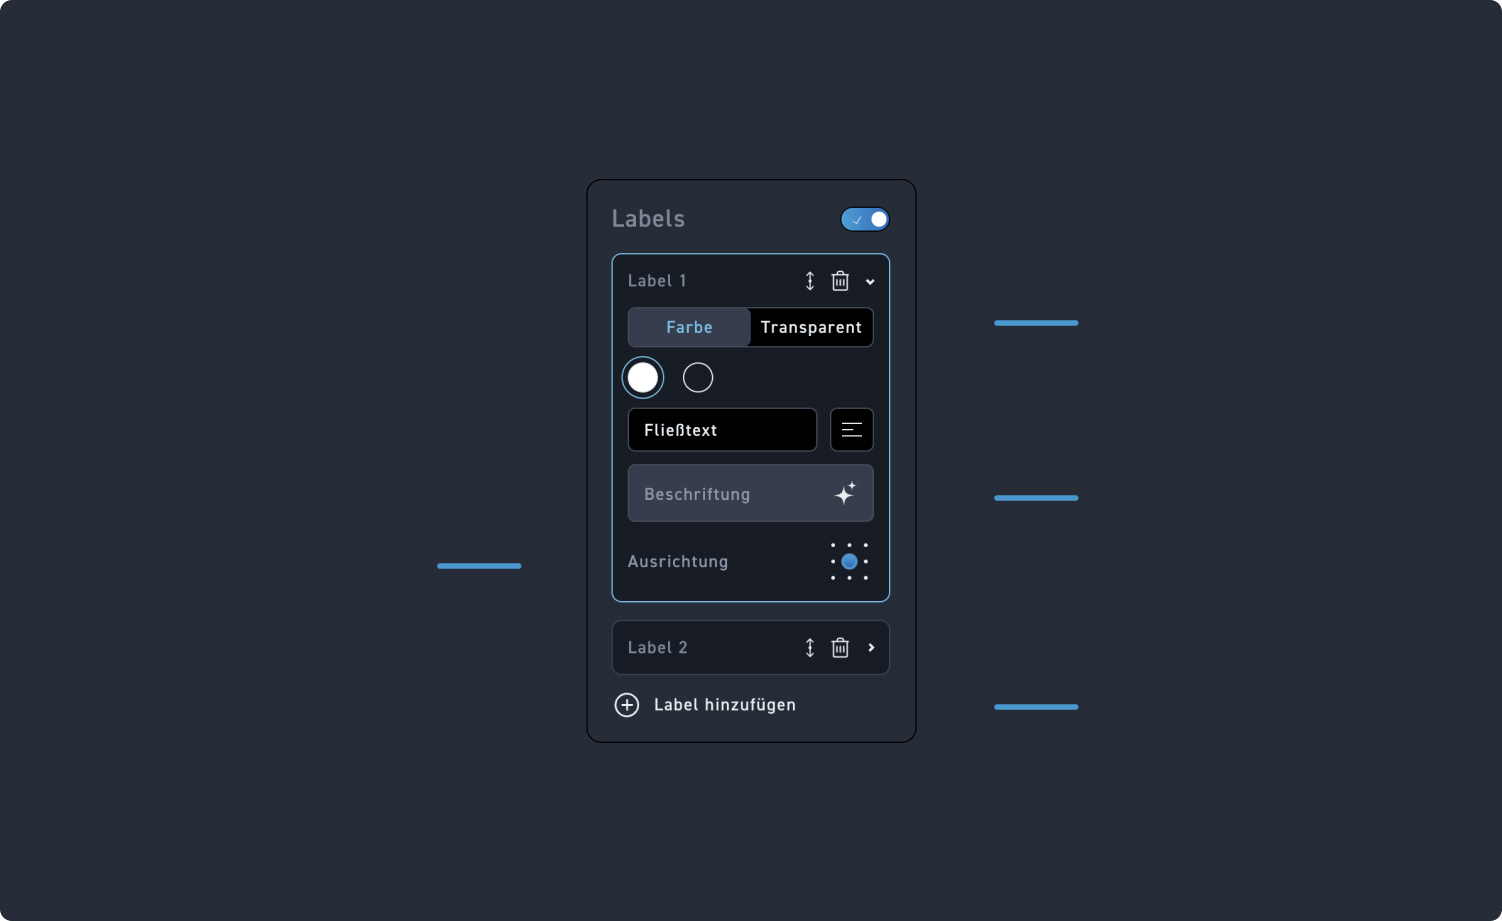
Labels are text fields that you can insert into, for example, images or hotspots. With these, you can describe and translate elements directly in the editor. Take a look at the hotspots to find out what settings you have for the labels.
1
Area
Decide whether your labels should have a color and, if so, which one. Or whether they are transparent.
2
Text
Paste your text into the label field and format it using the rich text editor.
3
Alignment
Determine the alignment of your labels.
4
Add labels
Click „Add labels“ to add another label.
Tip #
Images can be included as a single element or be part of another element.