User Management / Teams
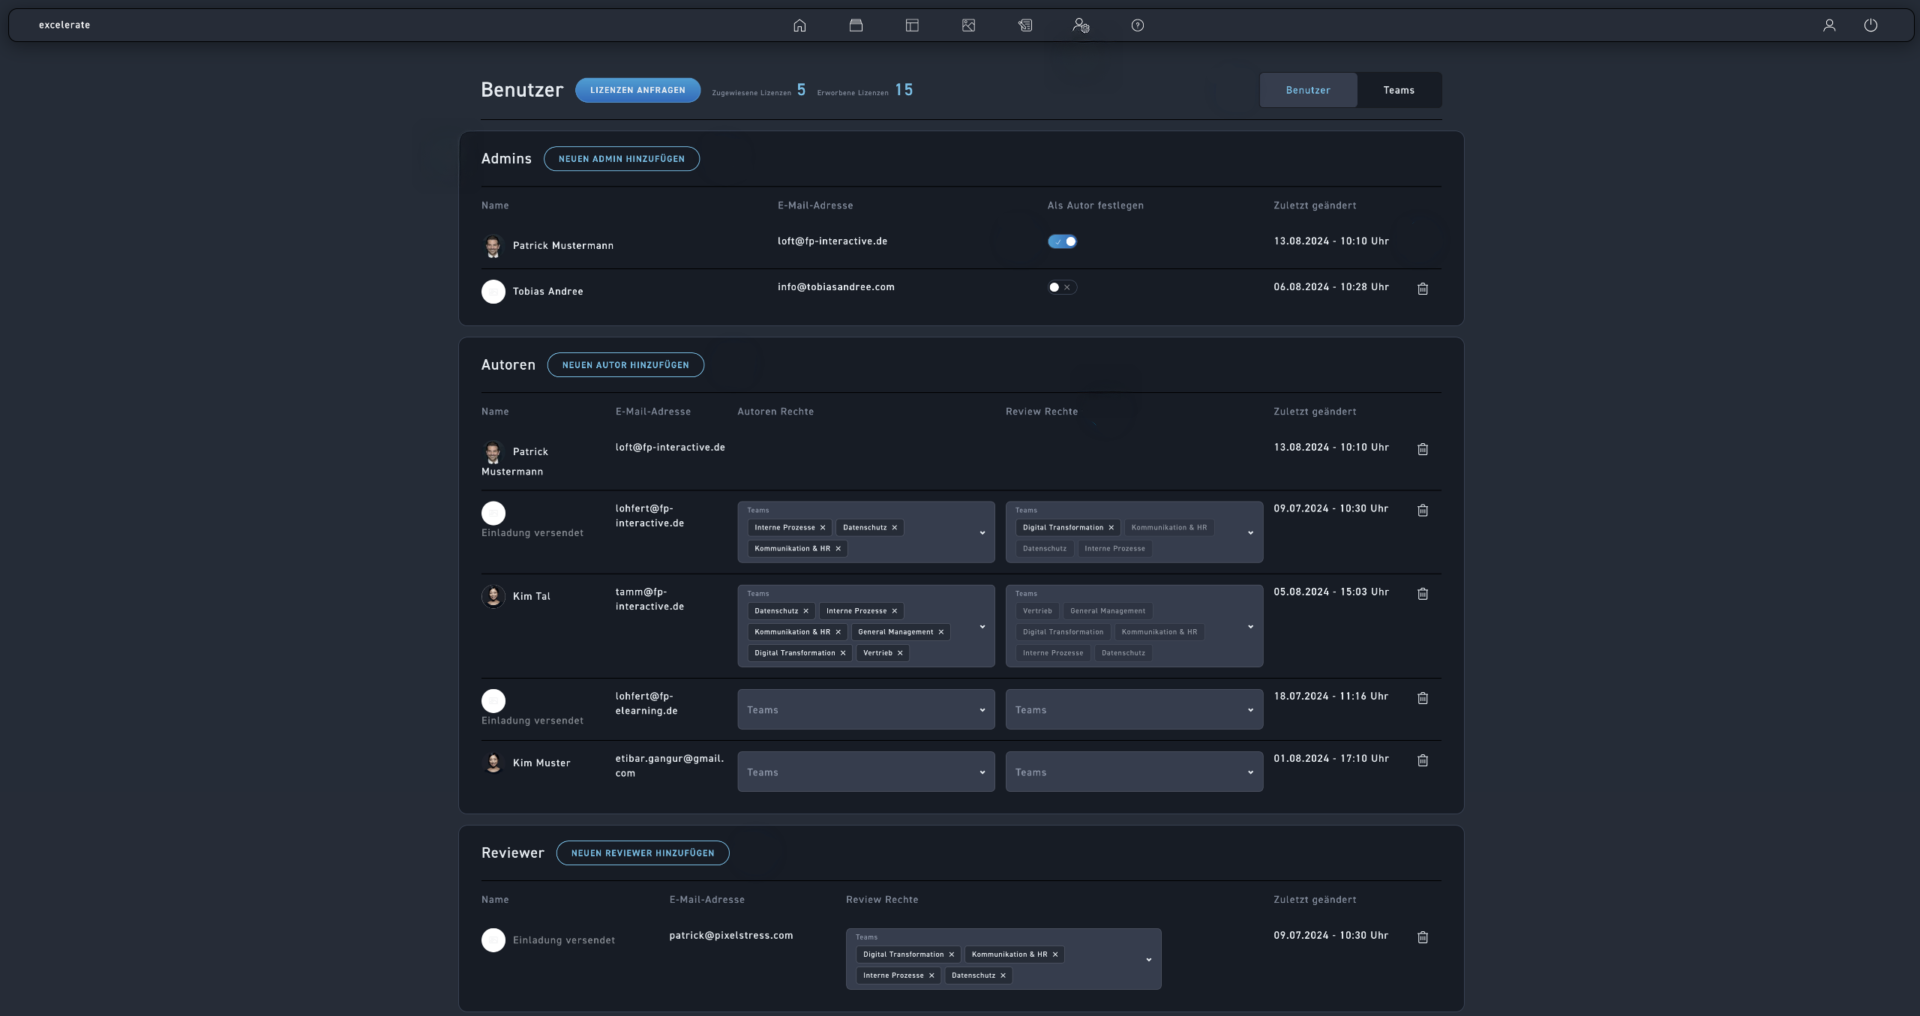
Click on the Users menu item.
Use the User and Teams buttons to switch back and forth between the different views.
Admins can manage users, view and comment on WBTs (not edit). There is no limit to how many administrators can be created.
The drop-down menu can be used to sort the list of users.
Under author rights, admins can be declared as authors, or authors can be restricted in their editing rights to groups.
To delete a user, simply click on the trash can icon.
To set a new admin, click on the Add Admin button and paste the desired email addresses. Separate the email addresses with a line break to invite multiple users at once.
If authors are supposed to act as reviewers in certain groups, they can be assigned using the "Review Rights" button.
You can contact us via the "Order Licenses" button to request a quote.
Reviewers can comment on WBTs. If assigned to a group, they only see the WBTs unlocked for that group. There is no limit to how many reviewers can be created.
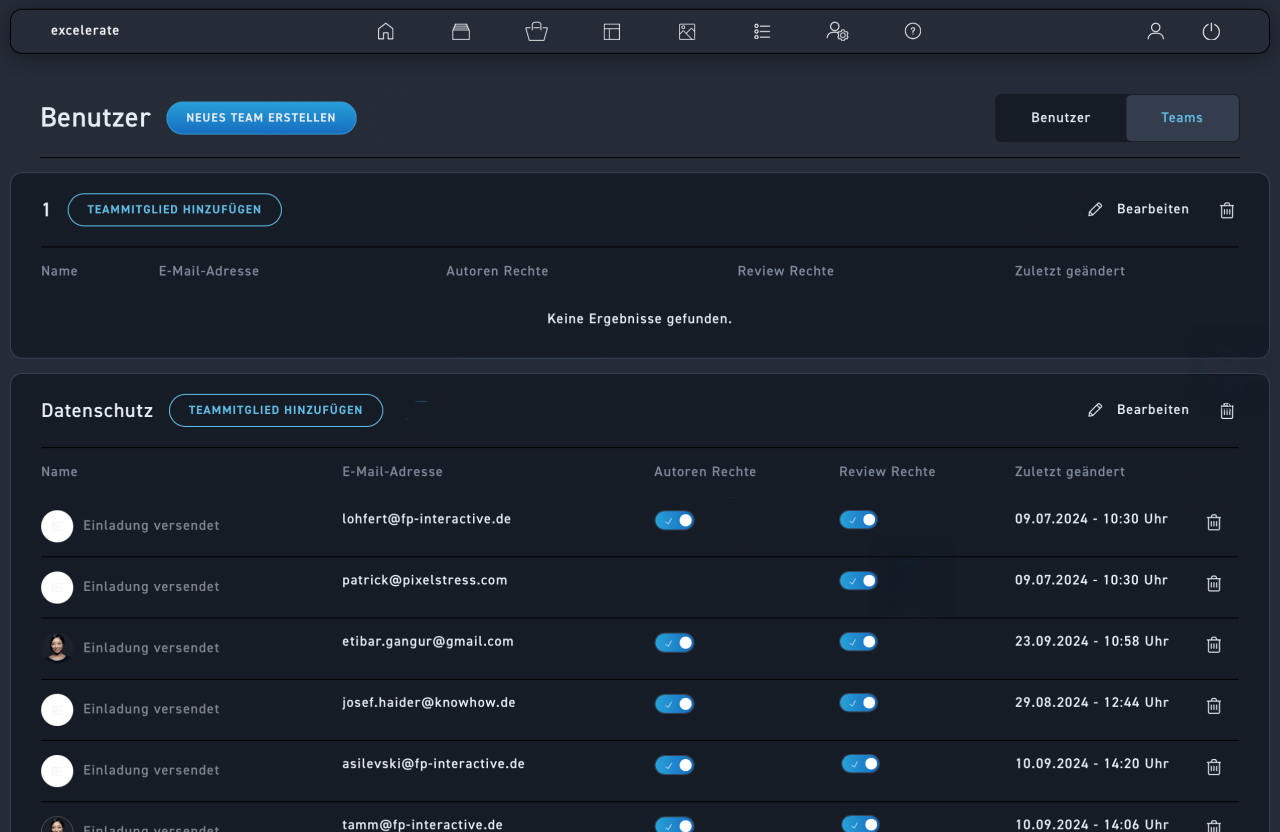
To create a group, click on the Create new team button and enter the name in the text field
To edit a team name afterwards, click Edit next to the name.
To add new team members to a group, click on the Add Team Member button.
Under Author Rights, you can decide whether an author in your group is allowed to edit WBTs or not.
Under Review Rights, authors can be marked as reviewers.
Click the Delete Team button to delete a team.
Click the trash can icon to delete a user.